
Step 1:
Before beginning, make sure you are signed in to Google primarily with an account you're comfortable receiving rescuer data on.
Step 2:
Now that that's the case, create a copy of the underlying Google Form by pressing the button below and then pressing the "Make a copy" button on the opened page.
Step 3:
Once you have copied the form, follow the instructions below to create the underlying spreadsheet, selecting the ">" to advance to the next
step.
Optionally, if you would like to rename the form, now is a good time to do so.
To do so, click three times on the text beginning with "Copy of" in the top left-hand corner of the site.
Then you will be able
to change the title to what you wish. Proceed as normal.
Step 3.1
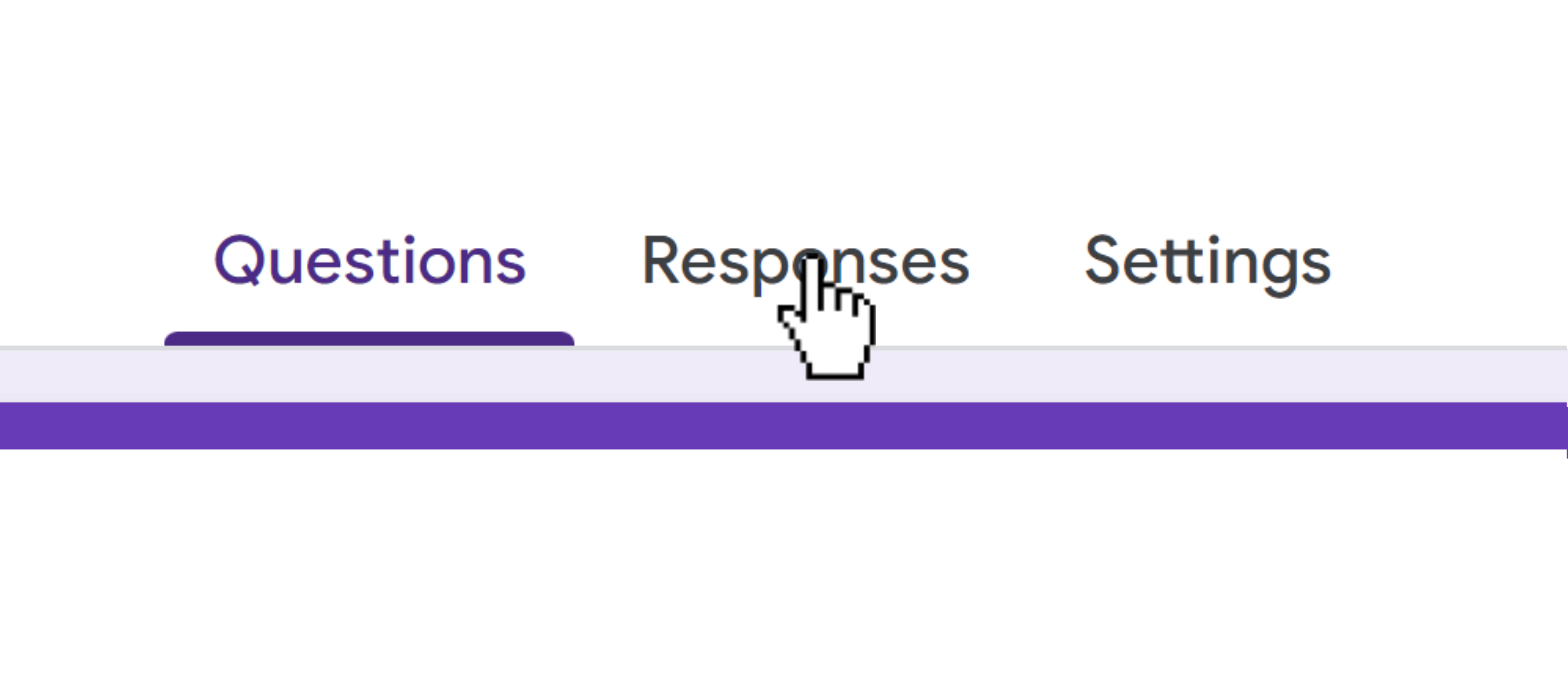
Upon copying the form, navigate to the Responses tab at the top of the page.
Step 3.2
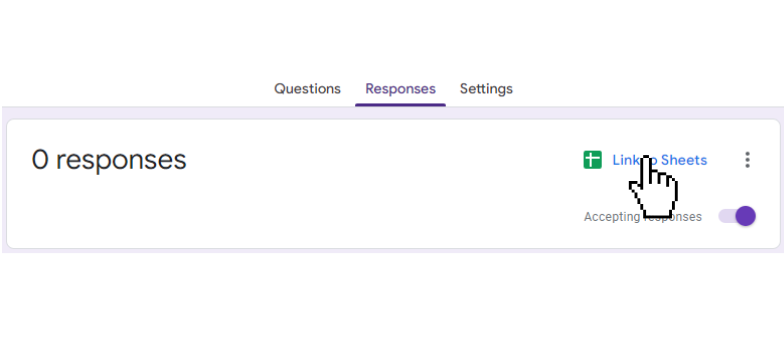
Select Link to Sheets.
Step 3.3
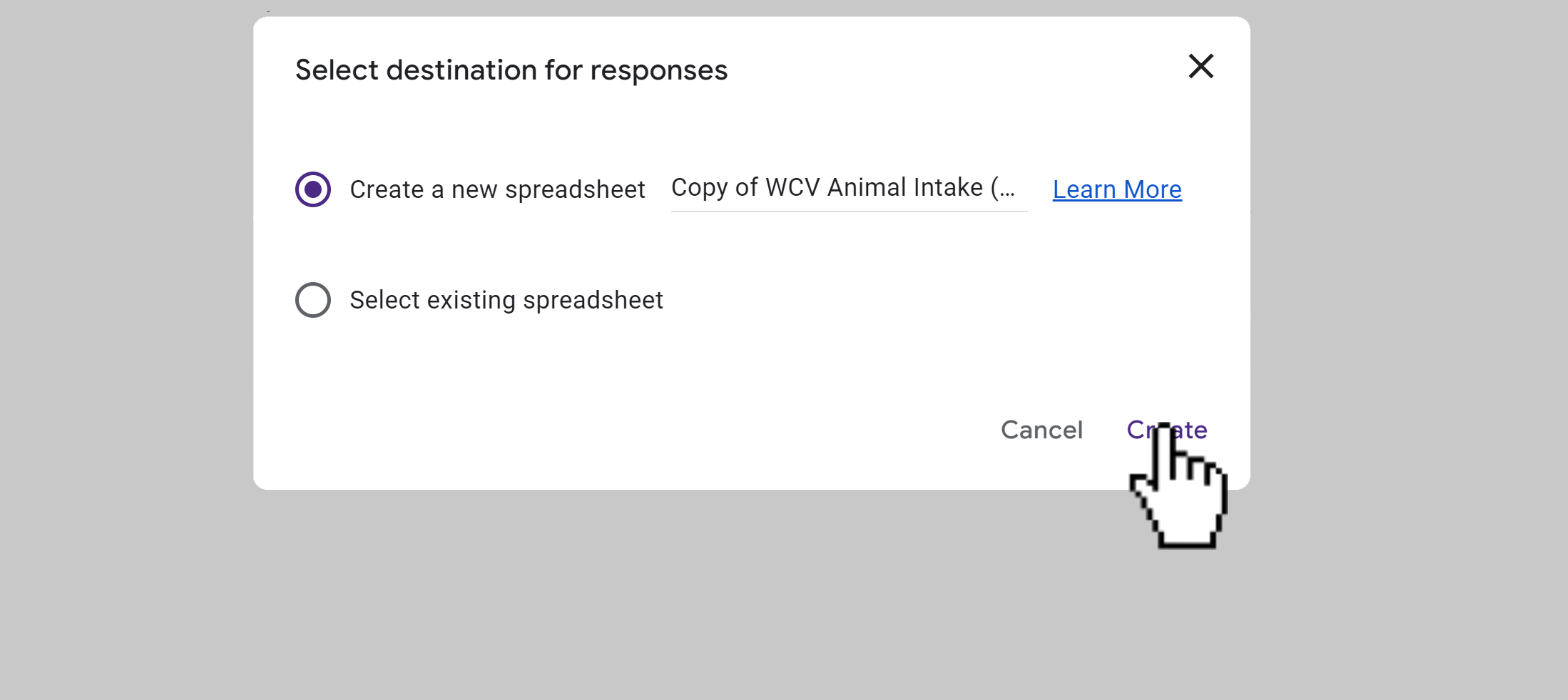
Ensuring "Create a new spreadsheet" is selected, click Create. Doing so should open that spreadsheet
Each column in this spreadsheet corresponds to an entry in the Google Form.
In the likely event that you would like another column in the spreadsheet, add a question entry by following the steps below.
Otherwise, continue to Step 4.
Step 3.4
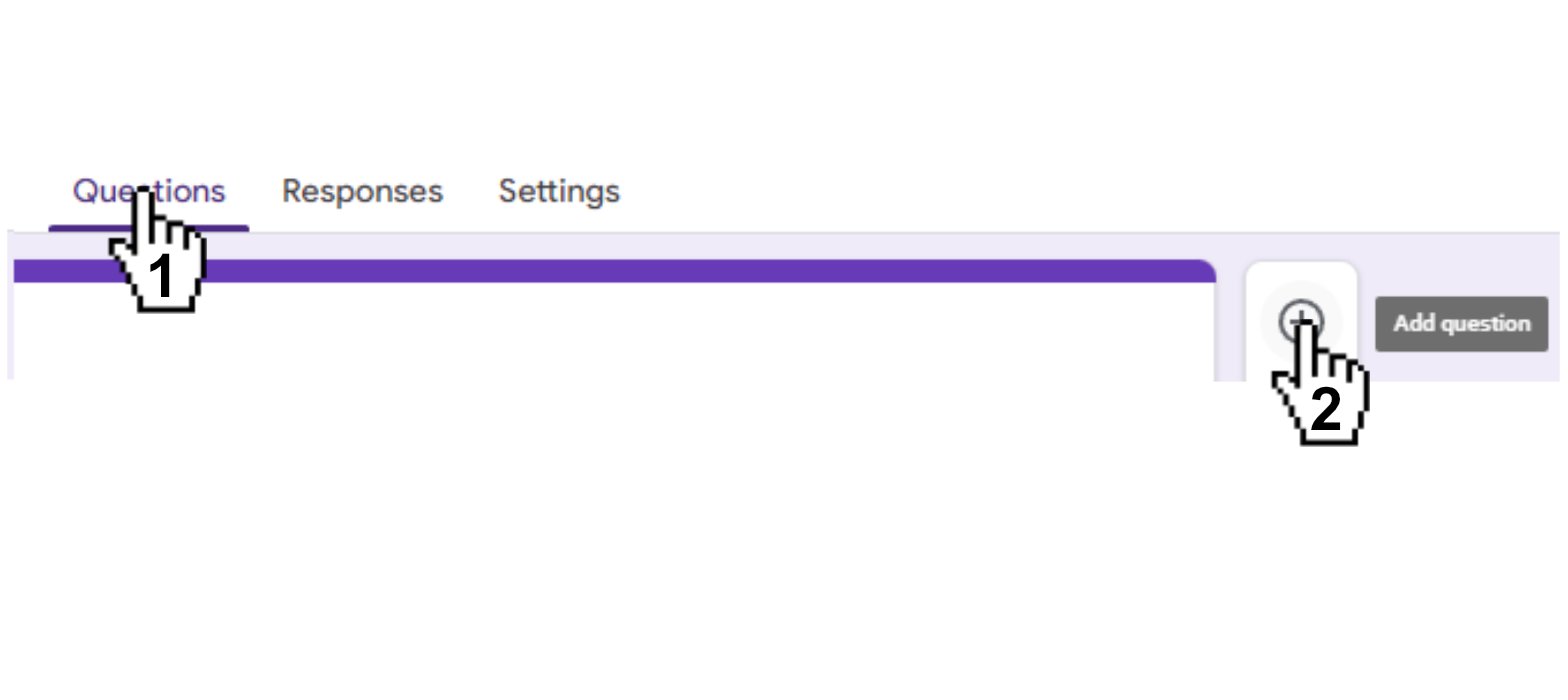
Return to the Google form, and select the "Add question" button in the question tab.

Step 3.5
On the newly created question, select the dropdown labeled Multiple Choice
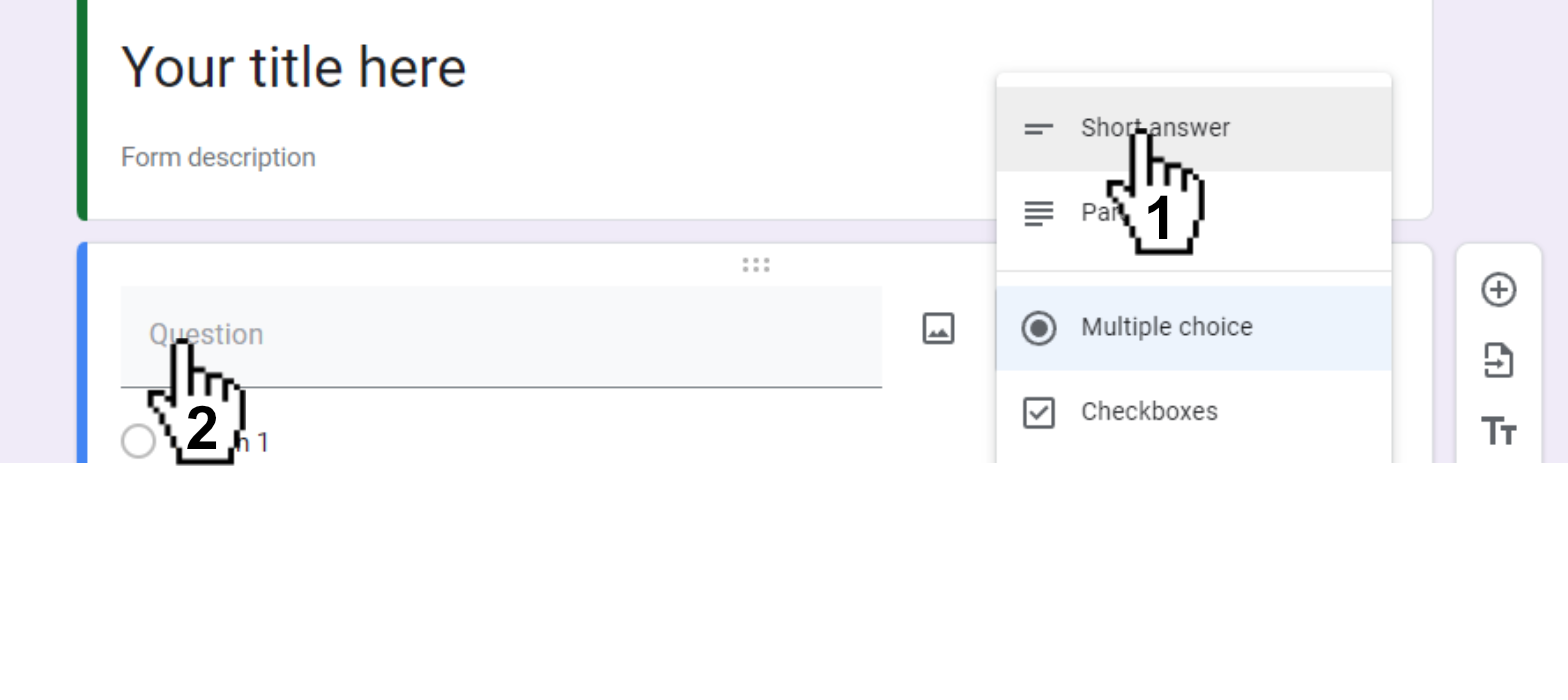
Step 3.6
Select Short Answer from the dropdown. You're now able to select the box labeled "Question" to name the question the name you want. Doing so will propagate to the Google Sheet the next time the form is submitted.
Step 3.4
Return to the Google form, and select the "Add question" button in the question tab.
Step 3.5
On the newly created question, select the dropdown labeled Multiple Choice
Step 3.6
Select Short Answer from the dropdown. You're now able to select the box labeled "Question" to name the question what you want. Doing so will propagate to the Google Sheet the next time the form is submitted.
Step 4:
If you haven't already, return to the Google Form. Then, proceed with the instructions below.
Step 4.1:
Important: Due to a recent change to Google Forms, it is necessary to manually publish to form.
- Select the purple "Publish" button located in the top right corner of the screen.
- Doing so will open a pop-up with the title "Publish form". Under the header "Responders",
and to the right of the subheader "Specific people", is the blue text "Manage".
Select "Manage". -
This will open a second pop-up.
The last entry in the pop-up, before the "Done" button, is the "Responder view" entry.
Click on the text "Restricted" to the right of the entry title "Responder view". - Clicking "Restricted" will open a drop-down menu. Select "Anyone with the link".
- Click the blue "Done" button. This will re-open the previous pop-up. Select "Publish".
-
The form is now ready for the next step.
Click the right arrow in the top right of the image below to progress through the next steps.

Step 4.2
Select the three vertical dots (⋮) in the upper right corner of the site .
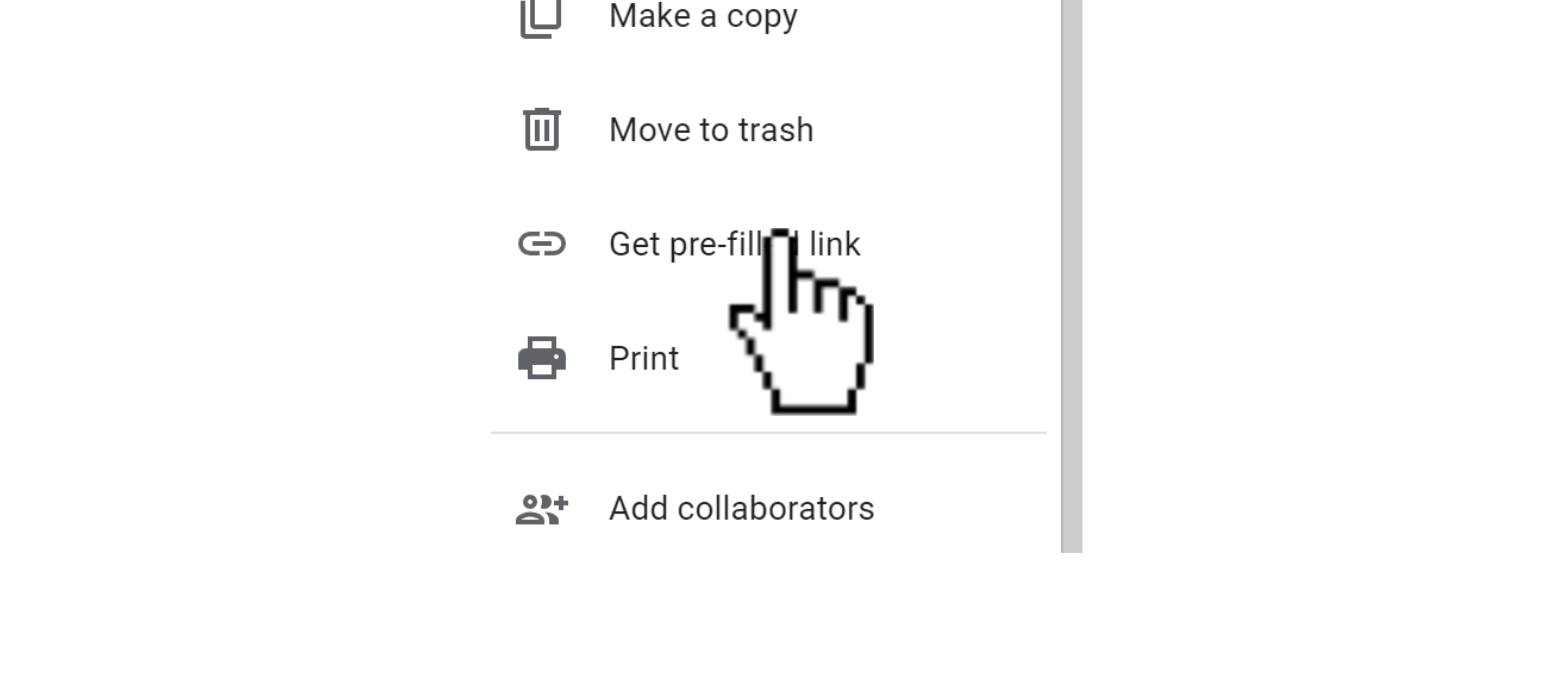
Step 4.3
From the dropdown, choose "Get pre-filled link".
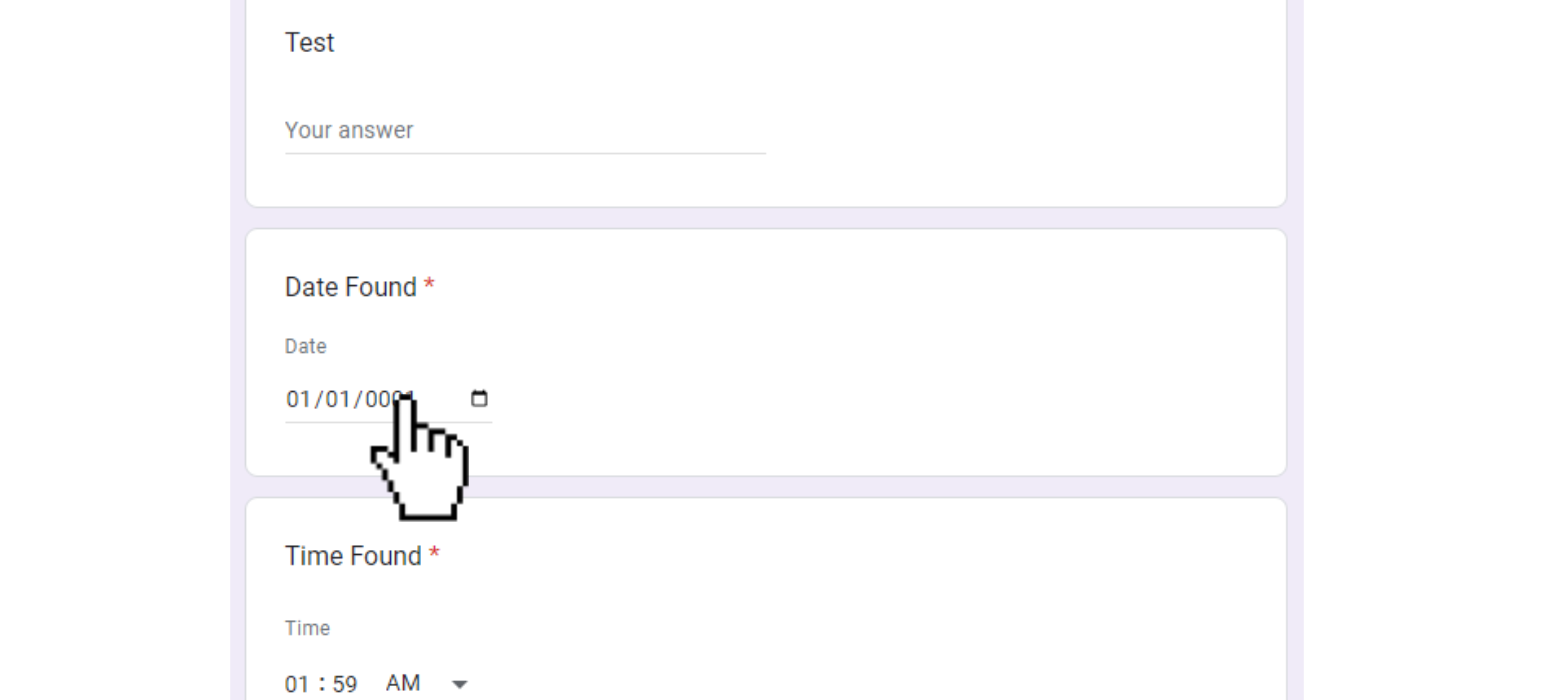
Step 4.4
Enter data into question entries with red asterisks next to their names.
The data only needs to be a valid entry, the content doesn't matter.
For example, entering "a" into each short answer box is entirely acceptable.
When entering data, make sure you fill in every required field and no other fields.
Once you have entered data into each of the form's required fields, click the button labeled "Get link".
Step 5:
Paste the link from Step 4 into the input below.
Step 6:
GitHub is a Microsoft service that hosts the website.
In order to have your own version of the website, which is required to use the form, you need to make a GitHub account.
If you do not already have an account, click here to create one.
When you have a GitHub account, please enter the username in the box below.
Step 7:
This step serves to create a "repository", which will act as the website for the form.
"Forking" allows for your user to have its own version of the form.
Upon clicking the button below, GitHub.com will open in another tab.
When it does, simply click the green "Create fork" button and then return to this page.
Go ahead and press the button now.
Step 8:
This next step is required to get your site set up.
The following button will take you to GitHub, where you must authorize the
script that runs the site by
selecting the green button that says "I understand my workflows, go ahead and enable them".
Once you are done, return to this page.
Now that you have enabled the script that runs the site,
it's necessary to enable the "Pages" feature to work with it.
The following button will take you to the settings for the GitHub Pages feature.
-
Under the heading "Build and deployment" and the subheading "Source", click the dropdown
that reads "Deploy from branch".
- Now, select "GitHub Actions" from the dropdown.
- Continue to Step 9.
Step 9:
This next step is important for setting up your site with your form's unique data. If you are not receiving form responses in your Google Sheet, it is because either this step or a previous step was done incorrectly (especially Step 4).
- Press the "Copy configuration" button to Copy the configuration data.
- Select the "Edit configuration" button below to open your site's configuration file in a new tab.
- Delete the contents of the file and then "Paste" to apply the copied data to the file.
- Click the green "Commit changes" button in the top right corner
- On the opened pop-up, select the green "Commit changes" button to save the file.
- Wait a couple of minutes to allow the information to update